This section deals with how to create customised logos and add them to the documentation
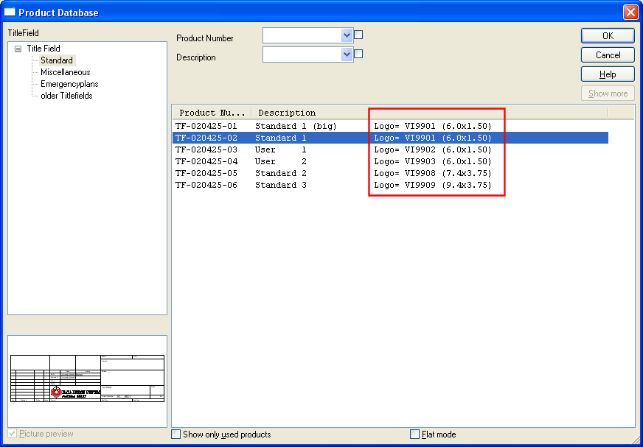
To use a customised logo on the drawing titles block you need to create a vector file (.VEC) containing the logo of the correct size and save it into your DDS-CAD User directory. When you insert a drawing title block into a model the standard title fields are listed in the product database, and for each one there is a reference to the associated logo used with the title field, and the expected size. See this image for details:
Product Database showing Title Blocks
To create a custom logo, you can start by opening and editing the default logo contained in the DDS-CAD system folder. For the "Standard 1" title block, the associated logo is VI9901, and you will find a .BIN file version of this in the system folder. Open the drawing list and click on the System Dir button to display the files in the System folder. Open the Vi9901.bin file for editing.
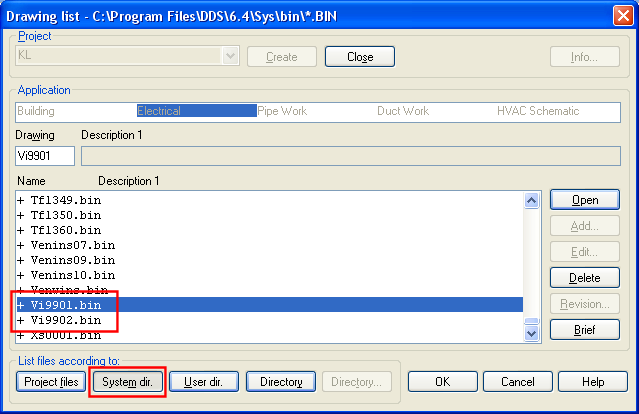
Drawing List showing how to open the title block logo in the system folder
Edit the file using the various tools available on the toolbox, or you can insert image files using the insert files command. The logo should be contained within the dimensions required for the title block, 6.0 m x 1.5 m for the Standard 1 title block for example.
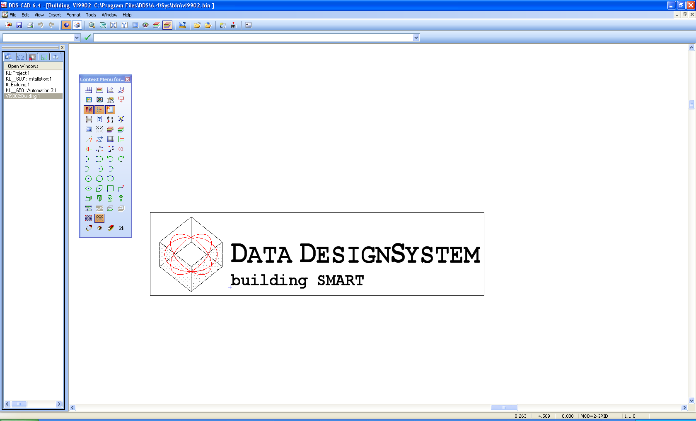
Edit the file to include the logo you require.
You should save the edited file in your user folder, however for the logo to be used it should be exported in VEC format and saved into your user folder. To do this, select Export Files/Lists on the toolbar and you will see this dialog:
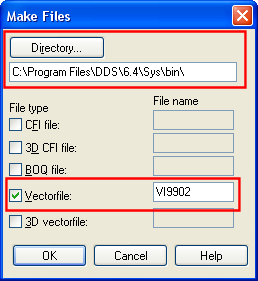
Make Files dialog
First select your User folder in the target directory, normally located at - \My Documents\DDS\User - then check the Vectorfile file type checkbox and enter the required file name and click on OK. The file will then be exported and you will see the logo in the title block each time you use it.
The logo used on the top of the printed reports can be customised by the user. DDS-CAD reports are created using Crystal Reports, a third party reporting tool in common use in many industries. It is possible for users to edit the DDS-CAD reports directly using the Crystal Reports application, but if all you require is to implement your own company logo on the printouts, then this can be easily achieved without having to purchase a separate tool.
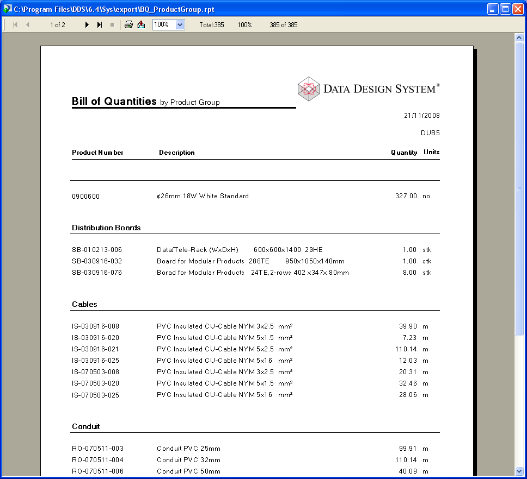
DDS-CAD Reports showing the default DDS logo which can be customised
To use your own logo you should edit the file dds_cr.bmp which is installed in the folder C:\DdsCr on the computer on which DDS-CAD is installed. You can edit this file using MS-Paint which is a standard Windows program, or using any other graphics editing software. Alternatively you can create a bitmap image with the dimensions 261x46 pixels and save it with the same name.
To edit the files directly using Crystal Reports, you will find the report files (.RPT) in the ...\Sys\Export\ folder of your DDS-CAD installation.