Ventilation duct – Start
Branch of from a vertical segment
Example
|
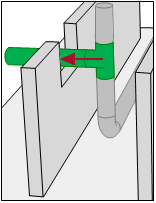
Suppose you want to start as a branch from an existing vertical duct segment. |
Required conditions
Workflow
|
|
Ventilation duct |
-
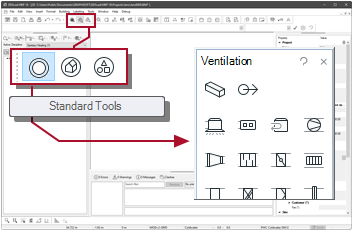
Activate: Standard Tools

-
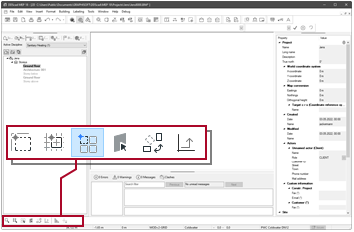
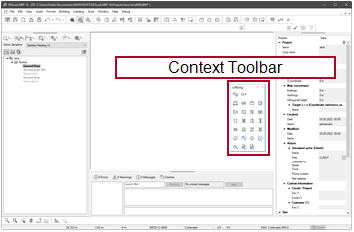
Select the function in Context Toolbar
The cursor appears as a crosshair.
-
Point to the vertical duct segment. The ventilation duct is highlighted. A menu lists the available options.
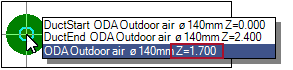
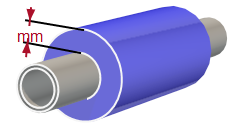
The indicated height corresponds to the center of the vertical segment, measured from the top of the finished floor.
- Select the entry that displays the medium and the height (Z).
The dialog appears: Give position in flow segment -
Define the installation height.

- Click OK.
The dialog appears: Tee - Check the dimensions.
- Activate:
 Automatically start drawing from this Tee
 - Click OK. You can continue with the next step.
- Click
 . The context menu appears.
 - Select: Properties
The dialog appears: Pipe Start -
Define the behaviour of the branch ventilating duct
 . You can determine which settings will be taken from the
  main line and will move further.
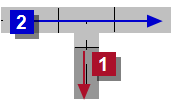 Associate Medium
Setting Effect
Default setting.
The branching duct
automatically uses the medium of the existing duct segment .
You can change the medium of the branching duct
. Associate Material / Color / Dim.
Setting Effect
Default setting.
The branching duct
takes over the color and material of the existing duct segment .
For the branching duct
you can select:- The color on the tabAttributes
- The material from the product database with...
Associate Insulation
Setting Effect
Default setting.
The branching duct
takes over the insulation material of the existing duct segment .
You can change the settings for insulation for the branching duct
.- Material in the tabInsulation
- Apply with Use Insulation
Use Insulation
Setting Effect
Insulation is applied to the duct. The material can be selected in the tab Insulation.
No insulation is applied to the duct. Associate Level
Setting Effect
The speed level is taken from the previous connection (e.g. from a branch of a tee).
You can freely determine the speed level.
More -
Check the missing settings (depending on point 3).
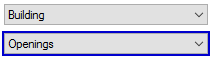
 Group / Type
For a better overview, all available medium types are organized into groups.
 ...
...
Opens the product database and allows the selection of a product.
Tab Duct sizing
Lock Dimension
Behavior in the pressure loss calculation:
Setting Effect
Dimensions will remain unchanged.
Dimensions can be changed. Associate Level
Setting Effect
The speed level is taken from the previous connection (e.g. from a branch of a tee).
You can freely determine the speed level.
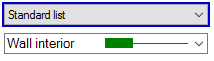
Velocity level
Association of the components to the selected velocity level.
Tab Attributes
Layer
Default
Setting Effect
The object is assigned to its default layer. An individual setting is disabled.
The status indicates that an individual setting applies to the object. Show numbers
Setting Effect
The layer number is displayed in addition to the layer name. The numbers can be used as a guide and sorting criteria in the manager.

The selection only contains the layer name.
 Layer
Layer
Making a setting removes the object from its default Layer and sets the layer association for the object individually.
Use Default will then be deactivated.DDScad manages its layers in several groups, which are primarily organized by discipline. To be able to specify a concrete layer, first select the group:
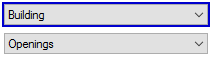
The active group determines which layers are available for selection:
If you would like to assign the default layer to the object again, select
Use Default. ...
Opens the dialog
Layer select .Pen
Default
Setting Effect
The object is assigned its default pen. An individual setting is disabled.
The status indicates that an individual setting applies to the object. Pen
Making a setting separates the object from its default Pen and sets the pen that is to be used individually.
Use Default will then be deactivated.DDScad manages its pens in several groups, which are primarily organized by discipline. To be able to specify a concrete pen, first select the group:
The active group determines which pens are available for selection:

If you would like to assign the default pen to the object again, select
Use Default. ...
Opens the dialog
User Defined Pen.Render surface definition
Default
Setting Effect
The object uses the default reference according to its object type. An individual setting is disabled.
The status indicates that an individual setting applies to the object. Show numbers
Setting Effect
The material numbers are displayed in addition to the material name in the selection. The numbers can be used as a guide and sorting criteria in the manager.

The selection contains only the name of the material definition.
 Render surface definition
Material definitions for the active group. With the setting you remove the default material from the product and assign a custom material.
Use Default is deactivated in the process.DDScad manages its materials into several groups, which are primarily organized by discipline. To activate the material definitions of another group, click on
 Render surface definition
If you want to display the object with its default material again, activate
Use Default. ...
Opens the dialog
Render Object .Tab Insulation
Use Insulation
Setting Effect
Insulation is applied to the duct.
No insulation is applied to the duct. ...
Opens the product database and allows the selection of a product.
- Click OK. You can draw the course.